Sandcanyon: Difference between revisions
HeadshotTAS (talk | contribs) No edit summary |
|||
| Line 5: | Line 5: | ||
TODO: Add video | TODO: Add video | ||
==Item Without Screw Attack== | |||
Normally Samus is meant to have [[Screw Attack]] in order to reach the platform containing the item in this room. However, using a [[Boost Jump]], it is possible to reach the item without Screw Attack. This can be done on both sides of the room. | |||
{{#ev:youtube|https://www.youtube.com/watch?v=KFsv-zg_w50}} | |||
==Secret World== | ==Secret World== | ||
Revision as of 17:51, 20 November 2021
| Connecting Rooms | ||
| Agon Temple Ventilation Area A |
Sandcanyon is a room in Metroid Prime 2: Echoes. It contains a Power Bomb expansion and a Secret World at both ends of the room. It consists of a very large gap bridged by a single platform carrying a structure in the center. The two Kinetic Orb cannons are normally used to cross the room, while getting to the center platform normally requires Screw Attack.
Terminal Fall Abuse
In the Dark Beam wallcrawl, the Terminal Fall triggers in the room are used to get to the side connecting to Ventilation Area A instantly.
TODO: Add video
Item Without Screw Attack
Normally Samus is meant to have Screw Attack in order to reach the platform containing the item in this room. However, using a Boost Jump, it is possible to reach the item without Screw Attack. This can be done on both sides of the room.
Secret World
On both ends of the room, there is a hole under the platform that can be used to go out of bounds. It consists of doing a well-timed jump under the platform in order to stand on an invisible wall that lies under the platform. You may either be able to stand on the wall instantly, or get stuck in a constant state of rising. If rising, you may either wait patiently for the game to deliver you on top of the wall or trick it to reposition you quickly.
Setup
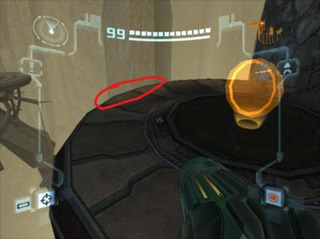
1. Stand at the edge of the platform as shown here.

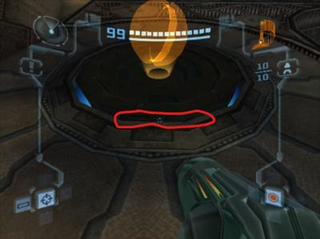
2. Aim at the very bottom of the black circle as indicated.

3. Jump back, and then once you are starting to fall beneath the structure, hold forward as much as possible so that you are pressing up against it.
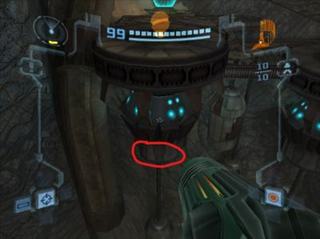
4. Wait until you have noticed the bottom part of the structure (circled below) has disappeared from your screen (This assumes zero helmet opacity). DON'T try to anticipate this. The human reaction time of actually "noticing" that it has disappeared is part of the setup.

5. At the timing just described in step 4, space jump and hold up-right on the control stick.
6. With absolutely perfect timing, you'll land right on the standable spot. However, 95% of the time you will just get stuck (keep holding up-right). From this, quickly slam right+left on the control stick and that should reposition you to the standable spot.
Notes:
- If you space jump too late, then you either won't get stuck at all (if you're super super late) or you'll get stuck but you're too low for the reposition strat to work.
- If you're too early, you won't get "under" the cannon structure at all, and will just bump into the structure and fall down.